

Kozyard Alexander 12' x 16' Hardtop Gazebo, Aluminum Frame with Galvanized Steel Double Roof, Outdoor Permanent Pavilion with Curtains and Netting for Patio, Backyard, Deck, Lawn Brown
$1,539.99
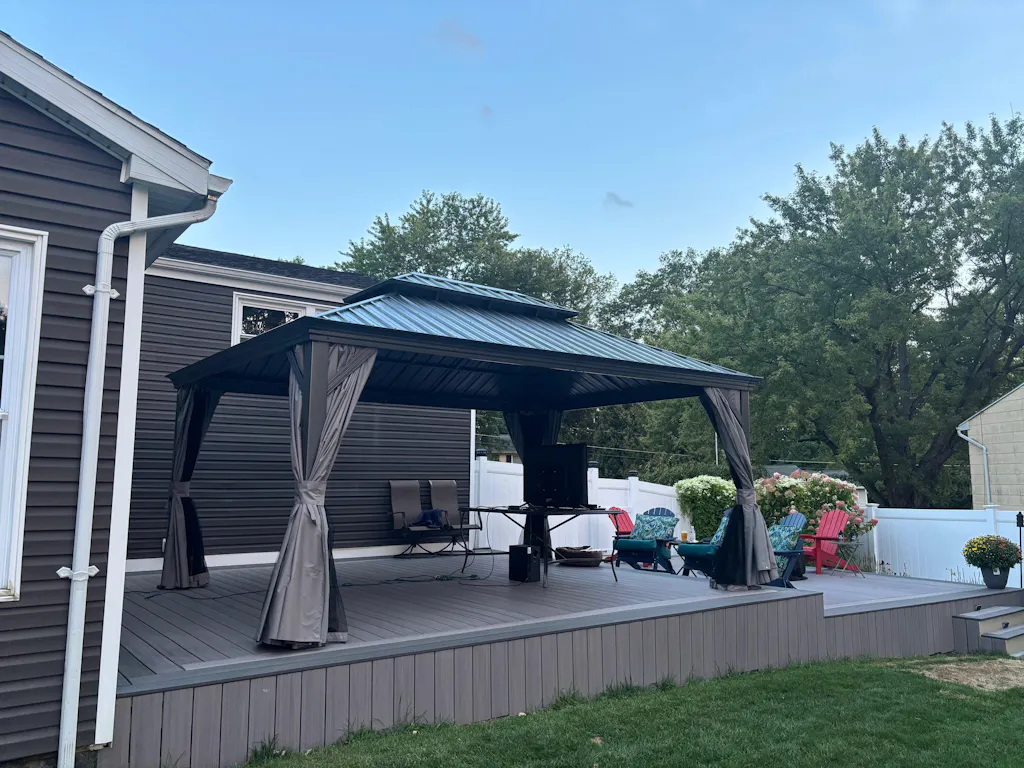
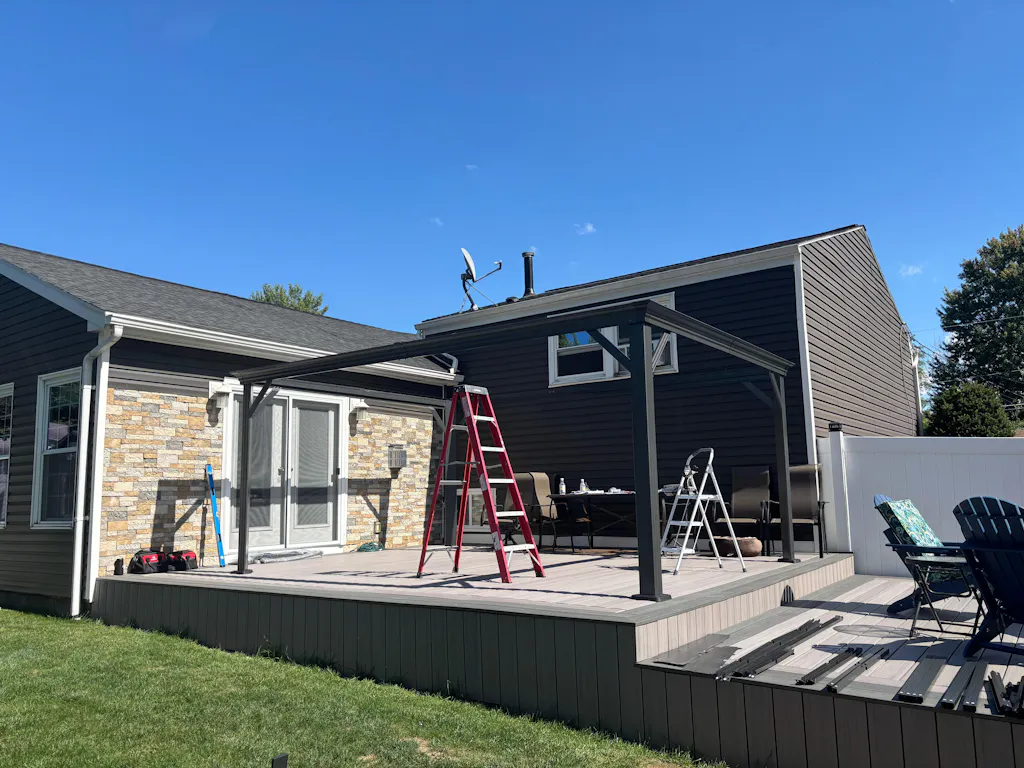
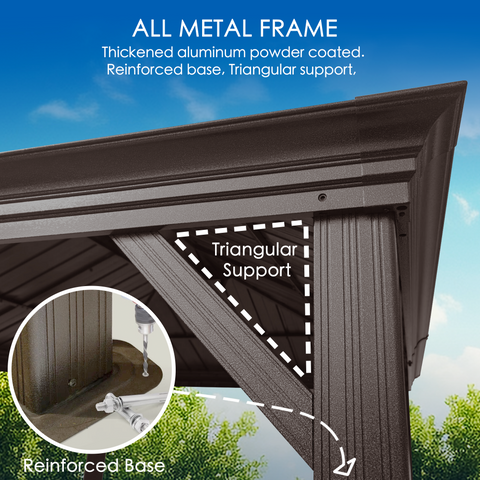
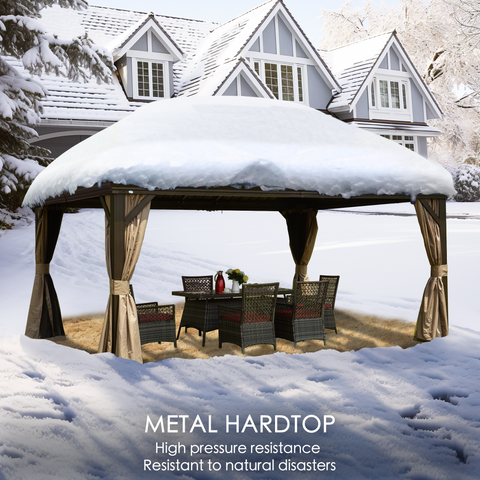
Heavy-Duty Frame & Superior Snow/Wind Resistance: This hardtop gazebo is built with 4.7” x 4.7” triangular aluminum poles and 5” x 4” reinforced beams, delivering exceptional strength and stability. The galvanized steel roof and all-metal frame provide superior durability—When properly anchored, the structure is engineered to handle a 2,500-lb snow load and withstand wind speeds up to 60 MPH.
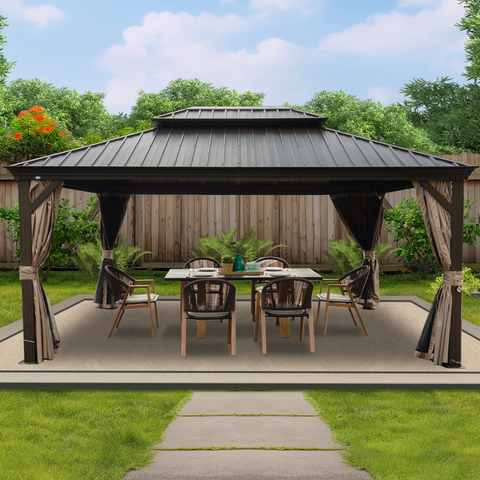
Ideal 12' x 16' Outdoor Lounge Space: The spacious 12' x 16' footprint accommodates outdoor dining sets, loungers, or seating areas, making it perfect for patios, decks, or backyard gatherings.
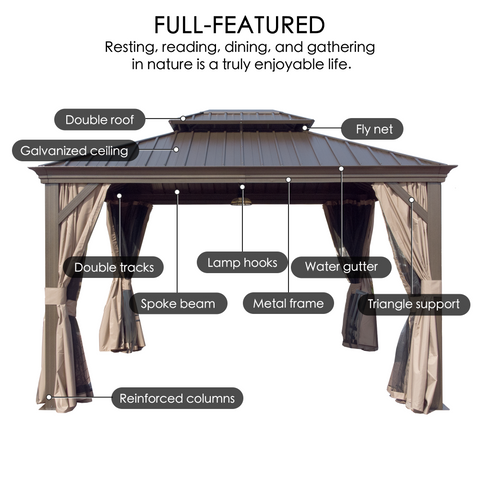
Curtains & Netting Included: Features fully enclosed double-sided zippers, a dual-track system, and double-layer sidewalls. The gray polyester curtains and mesh provide ventilation, privacy, UV protection, and rain protection—creating a comfortable and secure environment for your family.
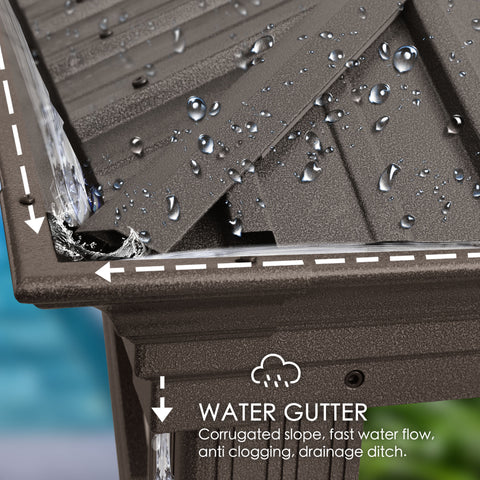
All-Metal Roof with Built-In Gutter System: The 29-gauge galvanized steel roof is thicker and stronger than the panels used in most gazebos on the market. The integrated water-gutter system efficiently channels rainwater away from the roof edges and down the poles to keep your outdoor area dry.
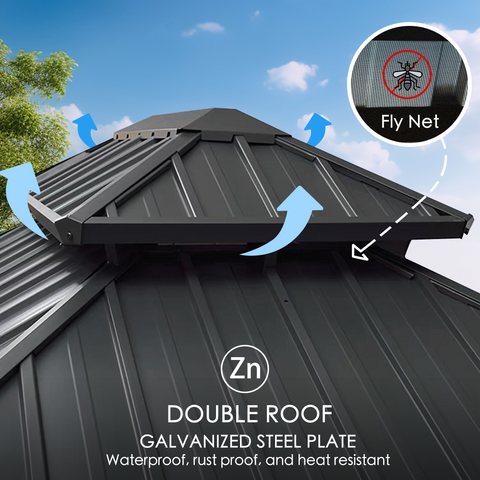
Double-Roof Design for Better Airflow & Wind Performance: The upgraded double-top structure enhances ventilation, reduces heat buildup, and improves wind resistance—while also adding a stylish architectural look to your outdoor space.
Built-In Ceiling Hook: A reinforced ceiling hook allows you to hang outdoor lights, string lights, or a ceiling fan to elevate your relaxation and entertainment areas.
The Alexander Hardtop Gazebo comes with a 1-year limited warranty and guaranteed parts availability. Our U.S.-based customer service teams in New Jersey and California provide responsive support—even after your warranty ends. To better serve our customers, our friendly bilingual representatives are available during U.S. business hours via toll-free phone or email, providing assistance in both English and Spanish.
Ideal 12' x 16' Outdoor Lounge Space: The spacious 12' x 16' footprint accommodates outdoor dining sets, loungers, or seating areas, making it perfect for patios, decks, or backyard gatherings.
Curtains & Netting Included: Features fully enclosed double-sided zippers, a dual-track system, and double-layer sidewalls. The gray polyester curtains and mesh provide ventilation, privacy, UV protection, and rain protection—creating a comfortable and secure environment for your family.
All-Metal Roof with Built-In Gutter System: The 29-gauge galvanized steel roof is thicker and stronger than the panels used in most gazebos on the market. The integrated water-gutter system efficiently channels rainwater away from the roof edges and down the poles to keep your outdoor area dry.
Double-Roof Design for Better Airflow & Wind Performance: The upgraded double-top structure enhances ventilation, reduces heat buildup, and improves wind resistance—while also adding a stylish architectural look to your outdoor space.
Built-In Ceiling Hook: A reinforced ceiling hook allows you to hang outdoor lights, string lights, or a ceiling fan to elevate your relaxation and entertainment areas.
The Alexander Hardtop Gazebo comes with a 1-year limited warranty and guaranteed parts availability. Our U.S.-based customer service teams in New Jersey and California provide responsive support—even after your warranty ends. To better serve our customers, our friendly bilingual representatives are available during U.S. business hours via toll-free phone or email, providing assistance in both English and Spanish.
3-5 Days Shipping
1 year warranty
30 Days return
Kozyard Alexander 12' x 16' Hardtop Gazebo, Aluminum Frame with Galvanized Steel Double Roof, Outdoor Permanent Pavilion with Curtains and Netting for Patio, Backyard, Deck, Lawn Brown
$1,539.99
Description